
Thursday, August 29, 2019
Turn 3 Reports are Out
Turn 3 Reports have been sent to both players. They may take their time to review them and prepare orders for Turn 4, which will run sometime in September.
Monday, August 26, 2019
Turn 3 Over
Turn 3 is over. Reports should be out this week. Turn 4 (the last turn in the 1st month of the campaign) will be in September. Game play will be the same as Turn 3. After Turn 4, players will be able to apply the resources they earned in July 1861 to build-up their forces.
There will be a few additional rule changes in play starting after Turn 4:
There will be a few additional rule changes in play starting after Turn 4:
- Simulation Balance: The simulation started with some differentiation in units available to the armies. After Turn 4, the simulation will be balanced with the same units, weapons and support available to each army.
- Simplification: Some features (and units) will be eliminated from the options for August 1861. (e.g. Heavy Artillery, Fortifications and several other items will not appear on the "menu" of options available for August 1861). Some of these may be added back later if the simulation continues.
- Cost Reductions: Many features will have reduced costs in resource points for August 1861.
- Railroad Guards: Regiments can be designated railroad / guards for a period of one month. The must stay on the railroad lines, but can be broken up into detachments and will have added movement features.
- Supply Lines: The rules instituted in Turn 2 will remain in effect
- Objectives and Points: The rules instituted in Turn 2 will remain in effect
- Detachments: With the exception of any railroad guards, the rules instituted in Turn 2 will remain in effect. (Cavalry can still be detached by battalion, artillery by section, infantry cannot have detachments unless assigned as railroad guards.)
- Warning of River Conditions: Players will be informed of the river levels before they issue orders for the next turn. A weather module is used and the river levels were normal in Turns 1 and 2, low in Turn 3, and will be normal in Turn 4. There have been no problems fording the river and none are expected in Turn 4.
New rules will not take effect until after Turn 4. Although new units and support cannot be called up until after Turn 4, a list of the revised options available and resources costs will be provided with the Turn 3 reports in the event that players want to start planning how they will develop their armies.
As another note, quality upgrades will be applied after Turn 4. All units that were present on the field in July 1861 will have a minimum quality/experience of "trained" (1) in August. Some units may have attained a higher level based on cumulative grades. Quality/Experience levels are applied across entire regiments (cavalry and infantry) based on the cumulative grade of the regiment, rather than by individual battalions. Artillery quality/experience is assigned by individual gun crew based on its cumulative grade
New units arriving in August 1861 will have a quality of "green" (0), unless they receive training.
Speaking of training.... the artillery has been highly ineffective at long range so far. Target practice would give increased accuracy, up to a +2 increase. It is something to think about. Likewise, infantry and cavalry target practice would give a +1 in accuracy. When two regiments or battalions of equal size fight each other, it has been extremely close as to which unit with withdraw based on casualty thresholds. A +1 accuracy bonus and an added loading bonus might be a big enough difference to inflict casualties at a higher rate than a unit of the same type and size.
Enemy Contact Report No. 9
Contact During the Grand Campaign:
July 22:
- Skirmish at Rowland Mills: A Union cavalry battalion heading south down the Germantown Pike is forced to retreat by Confederate infantry at Rowland Mills.
July 21:
- No contact
July 20:
- No contact
July 19:
- Skirmish at Newport: Confederate cavalry attacks Newport for a 3rd Day in a row, with re-enforcements coming in from the east. They finally take the town, with two battalions of cavalry, sending two Federal battalions back across the South Branch, river to North Bank.
July 18:
- Skirmish at Newport: Confederate cavalry again attempted to take Newport from the south, but was driven back by two battalions of Union cavalry.
- Engagement at Strawderman: A demi brigade (two regiments) of Union infantry advanced on Strawderman from Parson's Gap and engaged Confederate infantry and a battalion of cavalry. The Federals were forced back to Parson's Gap.
- Engagement at Sagarville: A regiment of Union infantry moved on Sagarville from Kingston, but was driven back by a Confederate infantry and artillery.
- Engagement at Mt. Vernon: A Confederate regiment advanced from Doyle's Ford and attempted to take Mt. Vernon from a regiment of Union infantry supported by a battalion of cavalry. After a sharp skirmish, the Confederates withdrew and the Federals held the town.
- Skirmish at Arlington: Confederates arriving along the Kingston Road from the east drive a battalion of Union Cavalry towards Tomlin's Ford and take possession of the town.
July 17:
- Skirmish at Atkins Ford: A battalion of Federal cavalry met Mosby's Rangers near the ford as the Confederates were returning from their failed raid on Georgetown. The Union cavalrymen drove them back northward toward Dover.
- Engagement at Kingston: A Federal force moved south from Black Horse Tavern and engaged a Confederate regiment at Kingston. The Confederates withdrew to Peyton's Mill, leaving the Union in control of Kingston.
- Engagement at Sagarville: A Confederate force drove back an advance by a small Union force arriving from Mount Zion Church.
- Engagement at Newtown: A force of Union infantry and a section of Artillery that had been driven out of Newtown on July 11, advanced from Milford and retook the town.
- Engagement at Cedar Grove: Confederates under Brigadier General Simon B. Buckner demonstrated against Cedar Grove. They made some gains, pressed their attack, and took the town, sending the Union force their in retreat to Greenville. Brigaider General Buckner was wounded during the action.
- Skirmish at Newport: A battalion of Confederate cavalry advanced north up the Old Stage Road to Newport and engaged a battalion of Federal cavalry deployed in the town. The Confederates were forced to withdraw back to the south.
July 16:
- Skirmish at East Troy: A regiment of Confederate infantry moved from Centerville to East Troy and forced a battalion of Union cavalry to abandon East Troy and retreat towards Rowland Mills.
July 15:
- Raid on Georgetown: Mosby's Rangers, a small mounted Confederate force, reached the Union base of supply and depot at Georgetown. It encountered a small Federal garrison there and was forced retreat southward down the Germantown Pike.
July 14:
- No contact
July 13:
- Engagement at Cedar Grove: Confederate Brigadier General Simon Bolivar Buckner advanced from Strawderman to Ceder Grove and engaged a Federal force composed of a regiment of infantry supported by a section of artillery. The Union infantry held as its artillery opened with canister. Buckner was forced to retreat back to Strawderman.
July 12:
- Engagement at Stawderman: Moving east after his victory at Newtown the previous day, Brigadier General Simon Buckner advanced on Strawderman and engaged two regiments of Union infantry on the east edge of town. After a sharp fight in which Confederate artillery moved up for close support of the attack, the Federals were forced to withdraw north towards Parson's Gap.
- Skirimish at Newport: Two battalions of Federal cavalry crossed the Newport bridge from North Bank, but were opposed by a battalion of Confederate cavalry on the slope between the South Branch River and Newport. The Confederates put up a spirited defense, forcing back each of the enemy battalions at different times, but the Federals rallied and forced the Confederates to abandon Newport and retreat southward down the Old Stage Road.
July 11:
- Engagement at Newtown: A Confederate force identified as being under the command of Brigadier General Simon Bolivar Buckner advanced north from its victory on July 9th at Keyser Ford, and engaged a smaller Union force at Newtown. After a fight on the south side of town, the Federals were forced to withdraw towards Milford.
- Skirmish near Irvington: Confederate infantry marching north on the Germantown Pike encountered a Federal cavalry brigade moving south. They met at the Covington farm, just north of Irvington and the Federals broke under fire and retreated back to the north.
July 10:
- Skirmish at Centerville: A regiment of Confederate infantry supported by a cavalry contingent followed up on a victory at Nicholas the previous day by advancing on their defeated foe (a battalion of Federal cavalry) at Centerville. After a fight around the court house in the center of town, the Federals withdrew towards Tomlin's Ford, leaving the Confederates in possession of Centerville.
- Skirmish at Mount Vernon: A battalion of Federal cavalry advanced on southward on the North Branch Road and engaged a regiment of infantry at Mount Vernon. The Federals were driven back to Lyon's Store.
July 9:
- Skirmish at Orr Tavern: A Confederate cavalry battalion advanced from Monroe and took Orr Tavern from Federal Cavalry, which retreated to Riverside.
- Skirmish at Strawderman: Federal infantry and a section of artillery drove back a probe from Hogbin's Store by a battalion of Confederate cavalry.
- Skirmish at Keyser Ford: Federal cavalry moving south through Whitmer encountered a mixed Confederate force at the Bee Farm near Keyser Ford. The Union cavalrymen were driven back north up the Newtown Road.
- Skirmish at Arlington: A Federal cavalry probe from Tomlin's Ford was stopped at Arlington and driven back by a regiment of infantry.
- Skirmish at Nicholas: Confederate infantry supported by a contingent of cavalry blocked the Centerville Pike at Nicholas, halting a Federal cavalry battalion moving south from Centerville. The Union cavalry withdrew back to the north.
July 8:
- No contact
July 7:
- Skirmish at Lebanon: Confederates at Lebanon successfully defend the village against an attacking battalion of Federal cavalry. The Union troopers fell back to the north.
- Skirmish at Stawderman: Fresh off a victory at Hogbin's Store, a battalion of Confederate cavalry advances on Strawderman, but is met by two battalions of Union infantry. It is forced back to Hogbin's Store.
- Skirmish at Riverside Bridge (Riverside): A Confederate cavalry battalion advanced on the Newport Road towards Riverside. It was stopped by a Union battalion of cavalry at Riverside Bridge and forced to retreat towards Monroe. A Confederate Brigadier General was seriously wounded during the action.
July 6:
- Federals at Arlington withdraw to Tomlin's Ford as Confederates approach from Fulton.
- Skirmish at North Bank (Newport Bridge): Confederate cavalry storms Newport Bridge and takes North Bank. Federals withdraw to Knight.
- Skirmish at Cedar Grove: Fresh off victories at Indian Rock Manor and Clinton, a Confederate cavalry battalion attacks Federal units at Cedar Grove, but is forced to withdraw back to Clinton.
- Skirmish at Hogbin's Store: Confederate cavalry takes Hogbin's Store and drives Federal infantry northward to Strawderman.
- Skirmish at Newtown: A Confederate cavalry battalion advanced on Newtown from the south and encounters a Union battery supported by infantry and cavalry. It is forced back to Keyser Ford.
July 5:
- Skirmish at Centerville: Confederates almost take Centerville early in the morning, but are unable to do so. They wound and capture the Federal commanding officer prior to withdrawing to Nicholas.
- Skirmish at Clinton: Confederate attack the town from the south and force Federals to withdraw northward to Cedar Grove.
- Skirmish at Newport: Confederates advance against Newport, arriving in the afternoon to skirmish with Federals southeast of town. Federals are forced back across the river to North Bank.
July 4:
- Federals at Indian Rock Manor withdraw northward to Clinton as Confederates approach
- Skirmish at East Troy: Confederates are forced to withdraw west to Centerville
July 3:
- Federals at Sagarville withdraw west to Newtown as Confederates approach.
July 2:
- No contact
July 1:
- No contact
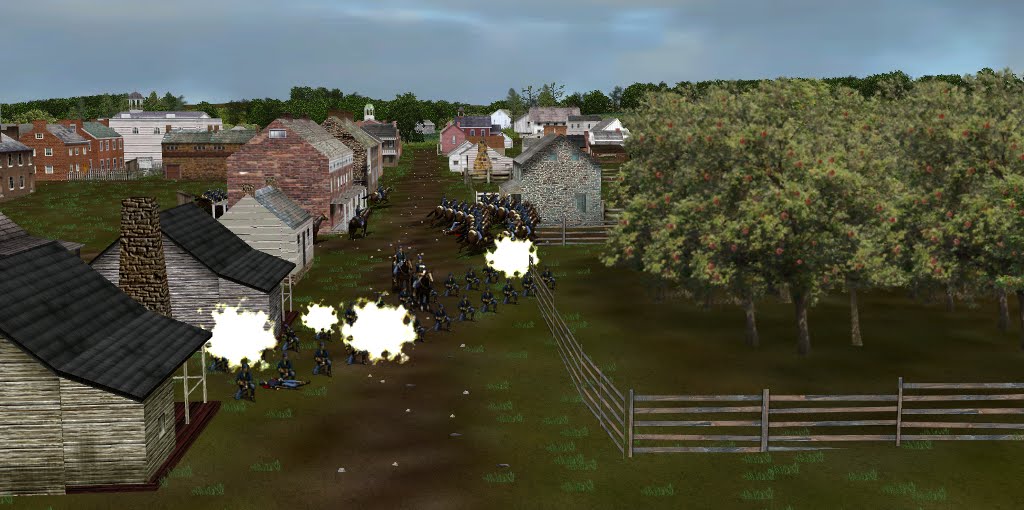
Short Skirmish at Rowland Mills (July 22nd)
A Union cavalry battalion was moving south down the Germantown Pike on July 22nd and approached Rowland Mills, occupied by a regiment of Confederate infantry. The infantry moved forward to engage. The cavalry dismounted and fired briefly, but then broke and retreated north back up the pike. Casualties were light and Confederates were left in possession of Rowland Mills.

 |
| Confederate starting position in the village of Rowland Mills at the intersection of the East Troy Road and Germantown Pike. The mill and mill pond are visible on the upper right section of the screenshot. |
 |
| Federal cavalry advances toward Rowland Mills on Germantown Pike, moving south. |
 |
| Looking east towards the northern end of the village as Confederates advance and engage the Union cavalry. The mill is seen in the foreground. |
 |
| Confederate infantry firing on the cavalry. |
 |
| The cavalry breaks and heads back north. |
Wheeler Attacks Newport Again (July 19)
For a third day in a row, Colonel Joseph Wheeler moves against Newport from Finley on July 19.
 |
| This time Wheeler and his 1st Battalion, 1st Tennessee Cavalry leave the Old Stage Road and advance on Newport from the southwest. |
 |
| The 2nd Battalion, 2nd Kentucky Cavalry under Lieutenant Colonel Isaac Richmond moves into position in the southwest corner of town to prevent Wheeler from gaining a foothold in Newport. |
 |
| As Wheeler and his 1st Battalion engage, Confederate re-enforcements (another cavalry battalion) arrive from the east. |
 |
| The 3rd Battalion, 1st Kentucky Cavalry moves up on the left of the 2nd Battalion, 2nd Kentucky to engage the newly arriving Rebel horsemen. |
 |
| An overview looking north. |
 |
| An overview looking south. |
 |
| After a prolonged skirmish, Federal casualties become more than Lieutenant Colonel Richmond can support. The Federals withdraw in good order to the north, across bridge to North Bank. Confederates now hold Newport and the two sides are able to observe each other from across the river. The third time is a charm for Wheeler. |
Summary of July 18th
July 18th was another active day of campaigning, with five engagements. Although most units have been engaged by now, a few units "saw the elephant" during skirmishes on the 18th. For the most part, the day went well for the Confederates. They held at Sagarville and Strawderman and re-took Arlington after it had been occupied by Federal cavalry for a day. Union troops occupying Newtown, Kingston, and Mt Vernon, however, have denied the Confederates control of the Kingston Road and the ability to easily move units east and west. The Confederates also failed to take Newport for the 2nd day in a row.

Most units will rest in place for the rest of the week. Expect another attempt by Joseph Wheeler to take Newport, and a skirmish in the far east at Rowland Mills. Turn 3 should be wrapped up with reports out over the coming weekend as we head into the home stretch of the 1st month of the campaign. Turn 4 will take place in September. Between turns 4 and 5, new units will be coming onto the field and strengthening each army. Players will also have the option of upgrading unit weapons.
Most units will rest in place for the rest of the week. Expect another attempt by Joseph Wheeler to take Newport, and a skirmish in the far east at Rowland Mills. Turn 3 should be wrapped up with reports out over the coming weekend as we head into the home stretch of the 1st month of the campaign. Turn 4 will take place in September. Between turns 4 and 5, new units will be coming onto the field and strengthening each army. Players will also have the option of upgrading unit weapons.
Enemy Contact Report No. 8
Contact During the Grand Campaign:
July 18:
- Skirmish at Newport: Confederate cavalry again attempted to take Newport from the south, but was driven back by two battalions of Union cavalry.
- Engagement at Strawderman: A demi brigade (two regiments) of Union infantry advanced on Strawderman from Parson's Gap and engaged Confederate infantry and a battalion of cavalry. The Federals were forced back to Parson's Gap.
- Engagement at Sagarville: A regiment of Union infantry moved on Sagarville from Kingston, but was driven back by a Confederate infantry and artillery.
- Engagement at Mt. Vernon: A Confederate regiment advanced from Doyle's Ford and attempted to take Mt. Vernon from a regiment of Union infantry supported by a battalion of cavalry. After a sharp skirmish, the Confederates withdrew and the Federals held the town.
- Skirmish at Arlington: Confederates arriving along the Kingston Road from the east drive a battalion of Union Cavalry towards Tomlin's Ford and take possession of the town.
July 17:
- Skirmish at Atkins Ford: A battalion of Federal cavalry met Mosby's Rangers near the ford as the Confederates were returning from their failed raid on Georgetown. The Union cavalrymen drove them back northward toward Dover.
- Engagement at Kingston: A Federal force moved south from Black Horse Tavern and engaged a Confederate regiment at Kingston. The Confederates withdrew to Peyton's Mill, leaving the Union in control of Kingston.
- Engagement at Sagarville: A Confederate force drove back an advance by a small Union force arriving from Mount Zion Church.
- Engagement at Newtown: A force of Union infantry and a section of Artillery that had been driven out of Newtown on July 11, advanced from Milford and retook the town.
- Engagement at Cedar Grove: Confederates under Brigadier General Simon B. Buckner demonstrated against Cedar Grove. They made some gains, pressed their attack, and took the town, sending the Union force their in retreat to Greenville. Brigaider General Buckner was wounded during the action.
- Skirmish at Newport: A battalion of Confederate cavalry advanced north up the Old Stage Road to Newport and engaged a battalion of Federal cavalry deployed in the town. The Confederates were forced to withdraw back to the south.
July 16:
- Skirmish at East Troy: A regiment of Confederate infantry moved from Centerville to East Troy and forced a battalion of Union cavalry to abandon East Troy and retreat towards Rowland Mills.
July 15:
- Raid on Georgetown: Mosby's Rangers, a small mounted Confederate force, reached the Union base of supply and depot at Georgetown. It encountered a small Federal garrison there and was forced retreat southward down the Germantown Pike.
July 14:
- No contact
July 13:
- Engagement at Cedar Grove: Confederate Brigadier General Simon Bolivar Buckner advanced from Strawderman to Ceder Grove and engaged a Federal force composed of a regiment of infantry supported by a section of artillery. The Union infantry held as its artillery opened with canister. Buckner was forced to retreat back to Strawderman.
July 12th:
- Engagement at Stawderman: Moving east after his victory at Newtown the previous day, Brigadier General Simon Buckner advanced on Strawderman and engaged two regiments of Union infantry on the east edge of town. After a sharp fight in which Confederate artillery moved up for close support of the attack, the Federals were forced to withdraw north towards Parson's Gap.
- Skirimish at Newport: Two battalions of Federal cavalry crossed the Newport bridge from North Bank, but were opposed by a battalion of Confederate cavalry on the slope between the South Branch River and Newport. The Confederates put up a spirited defense, forcing back each of the enemy battalions at different times, but the Federals rallied and forced the Confederates to abandon Newport and retreat southward down the Old Stage Road.
July 11th:
- Engagement at Newtown: A Confederate force identified as being under the command of Brigadier General Simon Bolivar Buckner advanced north from its victory on July 9th at Keyser Ford, and engaged a smaller Union force at Newtown. After a fight on the south side of town, the Federals were forced to withdraw towards Milford.
- Skirmish near Irvington: Confederate infantry marching north on the Germantown Pike encountered a Federal cavalry brigade moving south. They met at the Covington farm, just north of Irvington and the Federals broke under fire and retreated back to the north.
July 10th:
- Skirmish at Centerville: A regiment of Confederate infantry supported by a cavalry contingent followed up on a victory at Nicholas the previous day by advancing on their defeated foe (a battalion of Federal cavalry) at Centerville. After a fight around the court house in the center of town, the Federals withdrew towards Tomlin's Ford, leaving the Confederates in possession of Centerville.
- Skirmish at Mount Vernon: A battalion of Federal cavalry advanced on southward on the North Branch Road and engaged a regiment of infantry at Mount Vernon. The Federals were driven back to Lyon's Store.
July 9th:
- Skirmish at Orr Tavern: A Confederate cavalry battalion advanced from Monroe and took Orr Tavern from Federal Cavalry, which retreated to Riverside.
- Skirmish at Strawderman: Federal infantry and a section of artillery drove back a probe from Hogbin's Store by a battalion of Confederate cavalry.
- Skirmish at Keyser Ford: Federal cavalry moving south through Whitmer encountered a mixed Confederate force at the Bee Farm near Keyser Ford. The Union cavalrymen were driven back north up the Newtown Road.
- Skirmish at Arlington: A Federal cavalry probe from Tomlin's Ford was stopped at Arlington and driven back by a regiment of infantry.
- Skirmish at Nicholas: Confederate infantry supported by a contingent of cavalry blocked the Centerville Pike at Nicholas, halting a Federal cavalry battalion moving south from Centerville. The Union cavalry withdrew back to the north.
July 8th
- No contact
July 7th
- Skirmish at Lebanon: Confederates at Lebanon successfully defend the village against an attacking battalion of Federal cavalry. The Union troopers fell back to the north.
- Skirmish at Stawderman: Fresh off a victory at Hogbin's Store, a battalion of Confederate cavalry advances on Strawderman, but is met by two battalions of Union infantry. It is forced back to Hogbin's Store.
- Skirmish at Riverside Bridge (Riverside): A Confederate cavalry battalion advanced on the Newport Road towards Riverside. It was stopped by a Union battalion of cavalry at Riverside Bridge and forced to retreat towards Monroe. A Confederate Brigadier General was seriously wounded during the action.
July 6th:
- Federals at Arlington withdraw to Tomlin's Ford as Confederates approach from Fulton.
- Skirmish at North Bank (Newport Bridge): Confederate cavalry storms Newport Bridge and takes North Bank. Federals withdraw to Knight.
- Skirmish at Cedar Grove: Fresh off victories at Indian Rock Manor and Clinton, a Confederate cavalry battalion attacks Federal units at Cedar Grove, but is forced to withdraw back to Clinton.
- Skirmish at Hogbin's Store: Confederate cavalry takes Hogbin's Store and drives Federal infantry northward to Strawderman.
- Skirmish at Newtown: A Confederate cavalry battalion advanced on Newtown from the south and encounters a Union battery supported by infantry and cavalry. It is forced back to Keyser Ford.
July 5th:
-
- Skirmish at Centerville: Confederates almost take Centerville early in the morning, but are unable to do so. They wound and capture the Federal commanding officer prior to withdrawing to Nicholas.
- Skirmish at Clinton: Confederate attack the town from the south and force Federals to withdraw northward to Cedar Grove.
- Skirmish at Newport: Confederates advance against Newport, arriving in the afternoon to skirmish with Federals southeast of town. Federals are forced back across the river to North Bank.
July 4th:
- Federals at Indian Rock Manor withdraw northward to Clinton as Confederates approach
- Skirmish at East Troy: Confederates are forced to withdraw west to Centerville
July 3rd:
- Federals at Sagarville withdraw west to Newtown as Confederates approach.
July 2nd:
- No contact
July 1st:
- No contact
Retaking Arlington (July 18th)
A Confederate infantry regiment left Arlington on the morning of July 17th, allowing a surprised 3rd Battalion, 3rd Kentucky Cavalry to arrive from Tomlin's Ford and take possession of the town without a shot fired. On the 18th, a Confederate infantry regiment advanced up the Kingston Road and attacked the Kentucky Cavalry from the east. The cavalrymen held well, but were heavily outnumber and eventually withdrew in good order to Tomlin's Ford, leaving the Confederates in possession of Arlington once again.


Sunday, August 25, 2019
Attack on Mt. Vernon (July 18th)
Mt Vernon had been occupied by a Confederate infantry regiment on the morning of July 17th. That regiment left for Kingston in the morning, with a battalion of Federal cavalry and a regiment of infantry (3rd Indiana) arriving later in the day and occupying the town without incident. On the 18th, the 2nd Tennessee arrived via Doyle's Ford and attacked the town. The Union cavalry opened fire first. Rather than waiver, the Confederates advanced into the western edge of the town and returned fire at close range. The 3rd Indiana closed in, deployed and opened fire, as the Union cavalry fell back into an orchard to the rear. The firing kept up, until the Union left gave way. The Union right, however, held firm. The Confederates eventually withdrew in good order, back toward Doyle's Ford.
Engagements are run with a threshold of casualties for each side, based on the number of men present. Because the Union had more men on the field, their threshold was slightly higher. It was, however, a closely run fight. The Confederates fought extremely well and were forced to withdraw when the Union only had one casualty left to reach their own threshold. It could have gone either way and the Confederates came out of the engagement with higher grades, even though they did not succeed in taking the town.


Engagements are run with a threshold of casualties for each side, based on the number of men present. Because the Union had more men on the field, their threshold was slightly higher. It was, however, a closely run fight. The Confederates fought extremely well and were forced to withdraw when the Union only had one casualty left to reach their own threshold. It could have gone either way and the Confederates came out of the engagement with higher grades, even though they did not succeed in taking the town.
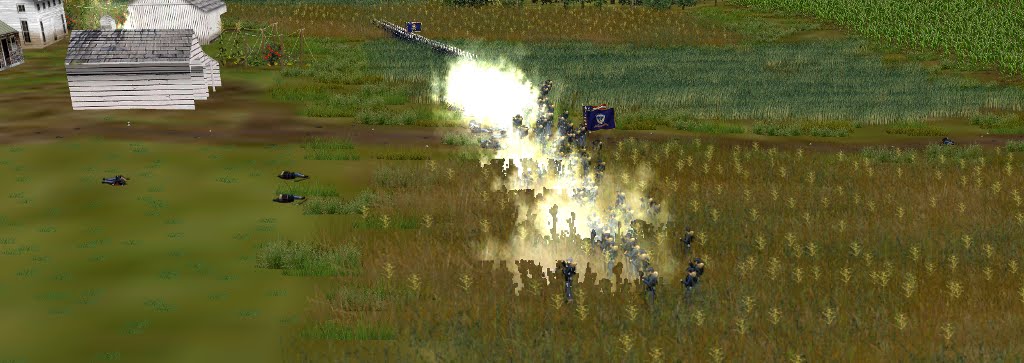
Holding Sagarville (July 18th)
Confederates took Sagarville on July 17th, as they lost Kingston to the immediate east. On July 18th, a Union regiment, identified as the 4th Indiana, advanced on Sagarville. As soon as it crossed Battle Creek, it came under fire from a section of Confederate artillery deployed north of town. A Tennessee Regiment advanced out of Finch's Woods and engaged the Federals. One Union battalion engaged, while the 2nd Battalion moved on the Confederate flank. Eventually, the 1st Battalion fell back under heavy fire, allowing the Tennessee regiment to turn and fire on the 2nd Battalion. The 1st Battalion quickly reformed and moved back into the action at the doubled quick, now taking the flanking position. But... another Confederate regiment moved out of Sagarville in support. The Federals then withdrew in good order back to Kingston.


Saturday, August 24, 2019
Confederates Hang on to Strawderman (July 18th)
A Union force of two Ohio infantry regiments moved against Strawderman from Parson's Gap on July 18th. They found a Kentucky infantry regiment supported by a battalion of Tennessee cavalry holding the town. The Federals advanced and engaged, but could not get a foothold in the town. Eventually, the Ohioans fell back in good order and then withdrew back toward Parson's Gap.


Back at it at Newport (July 18th)
 |
| For a second day, Colonel Joseph Wheeler advanced up the Old Stage Road with the 1st Battalion, 1st Tennessee Cavalry to engage a Federal cavalry battalion occupying Newport. |
 |
| The Union cavalrymen, under Lieutenant Colonel Isaac Richmond, occupied the same position as the previous day, among the buildings at the edge of town. |
 |
| After the skirmish had started, another Union cavalry battalion approached on the Newport Road. |
 |
| The newly arrived battalion took a position on the right of the engaged battalion and also opened fire. |
 |
| Unlike the first battalion to engage, the newly arrived Union battalion started advancing as the fired in an attempt to close the gap with the enemy. |

 |
| Before they got too close, the Confederate line retreated and withdrew southward down the Old Stage Road to Finley. |
Thursday, August 22, 2019
Day 1 of Turn 3 Over
The 1st Day of Turn 3 is over. Overall, it was a good day for the Union, which took Kingston and retook Newtown. They failed, however, to take Sagarville. The Confederates made another attempt to take Cedar Grove and were successful this time. Minor cavalry actions at Newport, Orr Taven and Atkins Ford all went to the Union, although Orr Tavern probably would not have been taken if it had not been for an additional battalion arriving at the Confederate rear.

There will be continued action on Day 2 of Turn 3, with fighting at Newport (again), Strawderman, Sagarville (again), Mt. Vernon, and Arlington. At times the engagements might not seem to align with orders given, but they do. There was a lot of cross marching and timing differences in orders from the opposing sides. At times in Turn 3, opposing units will use the same stretch of road at different times without seeing or engaging each other. There is a lot of interesting movement, with some "near misses" on the march.
Stay tuned for news on Day 2 engagements starting this weekend.
News from Newport (July 17th)
A battalion of Confederate cavalry advanced north up the Old Stage Road on July 17th and encountered a battalion of Union cavalry defending the town of Newport. The two sides engaged, with the Confederates taking some cover by a fence along the road. The Federals were among the buildings at the edge of town. The skirmish was long and drawn out at the maximum range of the cavalrymen's weapons. Neither side attempted to close in or make a charge. After taken some losses, the Confederates disengaged and withdraw back down the road in the direction from which they had come. The Union cavalry retained control of Newport.


Tavern Taken (July 17th)
 |
| On July 17th, two Union cavalry battalions leave Riverside and cross the bridge over the South Branch River. Their objective is to take Orr Tavern, which has been under Confederate control since the 6th. |
 |
| As soon as they cross the bridge, they come under fire from a Confederate cavalry battalion in some pine trees in front of the tavern buildings. |
 |
| The Federal battalions dismounted to deploy, but had trouble getting into position under fire. |
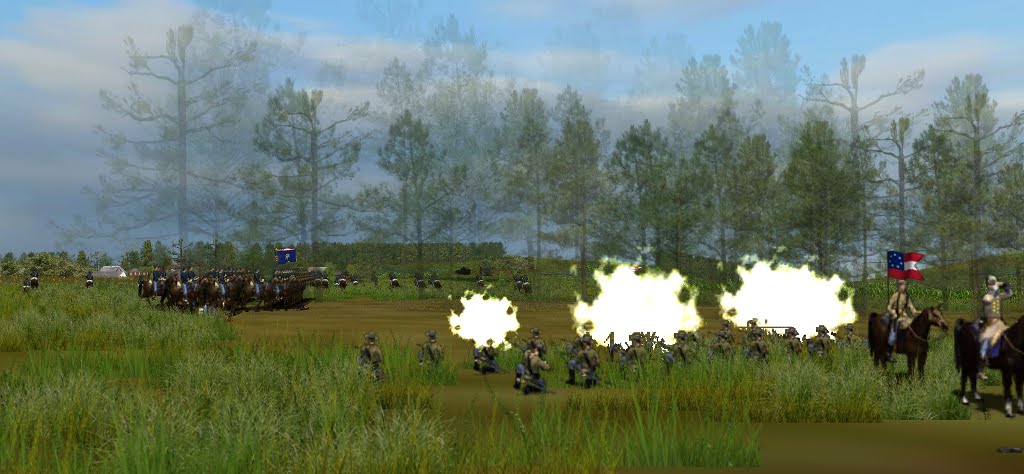 |
| The Confederates kept up a sharp fire, targeting one battalion then the other. |
 |
| One of the Federal battalions was driven back and had to reform near the river. |
 |
| As the Confederates were ably holding off the threat from Riverside, another Union cavalry battalion arrived on the Newport Road from the direction of Monroe. |
 |
| The newly arrived Federals deployed to the Confederate rear and opened fire from among the tavern buildings. |
 |
| The disordered Union battalion reformed and entered the pine trees to the Confederate front and the Confederates were taking fire from the front and rear. |
 |
| With losses suddenly mounting and the threat of capture, the Confederate cavalry was forced to abandon Orr Tavern and retreat to the south on the West Pines Road. |
Subscribe to:
Posts (Atom)